Remoting into WSL2 externally - the easy way.
Simple is better than complex.
So you have a Windows PC with WSL2 installed in it and want to SSH into it from another device like a Mac. The reason can be remote development, preference for a Linux environment, or any other.
Sounds simple enough on paper, you SSH into your Windows machine and run wsl.exe - but that does not work. With the latest versions of WSL2, one is unable to access the wsl executable over ssh.
kchauhan@MacBook-Air ~ % ssh fx505

kchauhan@FX505 C:\Users\kchauhan>wsl
The file cannot be accessed by the system.
But, there are many other (but confusing) ways to do it as per the internet.
- Uninstalling the latest WSL from Microsoft Store and installing older versions using
wsl --install --inboxand using this popular guide by Hanselman. - Bridge Networking - Apparently only for Windows Pro users.
- These folks - recommend netsh, port forwarding, and all networking stuff that my lizard brain cannot handle.
The one that I find easy is this brilliant solution - that uses ProxyJump feature of SSH and makes the whole process simple. Let's figure out how to do that.
Configure SSH Server on Windows
We need to set up the SSH server on Windows to allow SSH connections. Here are some quick steps to do that.
On your Host (Windows)
- Go to Optional Features in Windows settings. Click on View Features and add OpenSSH Server.
- Hit
Win+R>services.mscto open the Services Console. - Double-click the OpenSSH SSH server service and set the Startup Type to Automatic
- Start the service.
- Assuming you have a single-user system (See here for more details) - Comment below from your
C:\ProgramData\ssh\sshd_configfile. This will allow the authorized keys to work (in our next steps).
Match Group administrators
       AuthorizedKeysFile __PROGRAMDATA__/ssh/administrators_authorized_keys
On your Client (The external device we will SSH into WSL from)
- SSH into Windows device. (The password will be the one you use to sign into your Microsoft account)
ssh username@<ip_of_your_windows_pc> - If it works fine, Exit the SSH session and generate the ssh keys for passwordless entry. Run
ssh-keygento generate a key pair (HitEnteron all options for default mode). - Copy these keys to the Windows system. The usual
ssh-copy-idonly works on*nixsystems. (Godammit, Windows! ). So we'll do it manually.
Open the ssh folder on your client.
cd ~/.sshCreate an SFTP session, transfer the id_rsa.pub key, and rename it to authorized_keys.
sftp username@<ip_of_your_windows_pc>
cd .ssh
put id_rsa.pub authorized_keys- SSH should now work without the password.
ssh <username>@<ip_of_your_windows_pc> - We will add this entry to our SSH config.
Example $HOME/.ssh/config - replace windows with your preference.
Host windows
        User <username>
        HostName <ip_of_your_windows_pc>
IdentityFile ~/.ssh/id_rsa- That's it. Now we just need to run
ssh windowsto open an SSH connection.
Configure SSH Server on WSL2
This one should be much easier. Below steps are for Ubuntu WSL.
On your WSL environment
Install openssh-server.
sudo apt install openssh-serverEnable the ssh service.
sudo systemctl enable --now sshCopy the same authorized_keys we previously created to WSL as well. (Simplest approach).
cd /mnt/c/Users/<username>/.ssh
cp authorized_keys ~/.ssh/
Running WSL on Startup
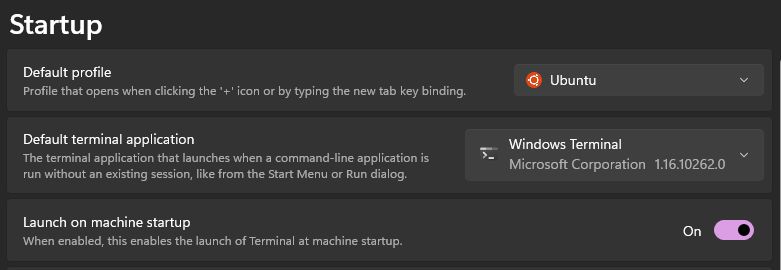
Again, lots of extensive solutions out there, the one that I find easy enough is just setting Default Terminal in Windows Terminal to wsl and running it on startup.

Proxy Jumping
With all done, we should be now able to SSH directly into WSL using the below ssh command.
ssh -J <windows_host_username>@<ip_of_your_windows_pc> <wsl_username>@localhostIf this works, let's add this to our SSH config to make it as simple as an ssh wsl.
Our final $HOME/.ssh/config should look like this.
Host windows
        User <username>
        HostName <ip_of_your_windows_pc>
        IdentityFile ~/.ssh/id_rsa

Host wsl
		User <wsl_username>
        HostName localhost
        ProxyJump windows
And that's it.
- Next: Running your own Copilot in VSCode on a Mac.
- Previous: Repurposing my laptop as a Home Server.